DVD Movie to PSP Video Conversion Guide - Mp4 Converter
Do you think PSP is really a great gadget?Do you think sometimes it's indeed a pity that you can't play DVD movies on your PSP?Do you want to watch your favorite DVD on PSP? Do you want to know the way to convert DVD to PSP video?
If the answer is YES, then follow my guide, from now on you don't have to worry about the limitations of PSP, I'll make you happy, enable you watch any DVD movies on PSP.
Kind remind: Please download below softwares before we start.
PSP Video 9
DVD Decrypter
Apple QuickTime (optional - for testing playback of converted file on your PC)
Now everything is ready, we totally need four steps to finish the converting process.
Step 1---DVD Ripping
1. Convert DVD.
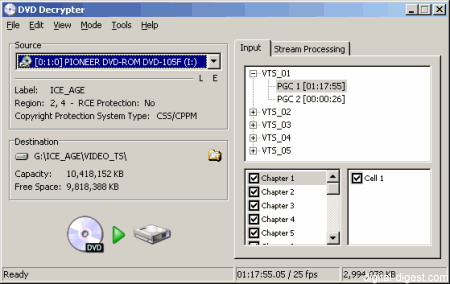
2. Run DVD Decrypter. From the "Mode" menu, select "IFO" (or press the "I" key on your keyboard).
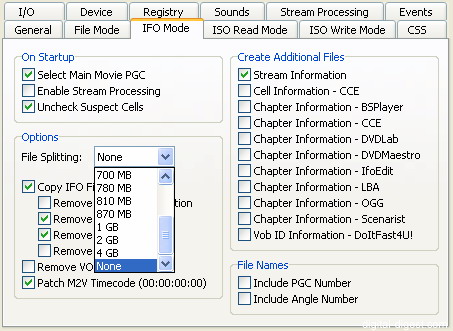
3. From the "Tools" menu, select "Settings". Go to the "IFO Mode" section and change the "File Splitting" option to "None". Press "OK" to save the setting. This setting is needed because by default, DVD movie files are split at the 1 GB limit on the original DVD. Since PSP Video 9 only supports single file inputs, it's important to ensure that no splitting occurs during converting.
4. If you look in the "Input" window, you will notice that a "PGC" (of a particular VTS set) has been selected for you. DVD Decrypter, by default, select the PGC with the longest running time - this is usually the main movie itself, so it is useful if you are planning to convert the movie, and not one of the extras.
5. If there are more than one PGC with the same length, then select any one of them will do. If there are many PGCs each with a slightly different length, then this may suggest that there are several versions of the same movie on the disc (eg. Terminator 2 theatrical cut, director's cut, extended cut ...), so make sure you select the version that you want to convert (eg. check the back of the DVD box to see the running time of each version).
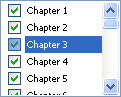
6. You can also choose only a particular chapter of the movie to convert by selecting/de-selecting the chapters listed. You can right click on this section and select all/no chapters (or invert your selection).
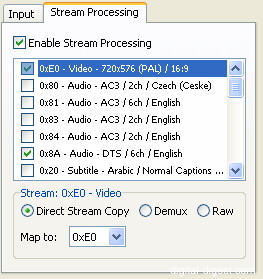
7. Now click on the "Stream Processing" tab and check the "Enable Stream Processing" option. This screen shows all the available audio, and subtitles within the current PGC/movie. Make sure that only the video, one audio track and no subtitle tracks are selected. Note that DTS audio tracks are supported by PSP Video 9 (although there isn't an advantage to selecting DTS audio, as the audio will be downcoverted anyway). If there are lots of options to select/de-select here, you can right click on this area and select one of the mass select/de-select options.
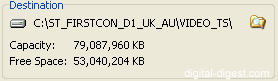
8. Now select a destination directory for your converted files (check and make sure you have enough hard disk space first - a typical DVD will be 4-8 GB in size, with the main movie usually between 4 and 6 GB).
9. Finally, press the big "Decrypt" button to start the converting process ...

Step 2---PSP Video 9 Set up
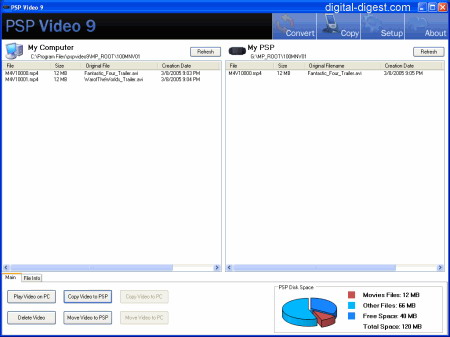
1. Start PSP Video 9. If this is the first time you've used PSP Video 9, you may get a screen that detects whether your PSP is connected or not. If your PSP is not connected, then you can skip this screen by selecting "Manually Specify PSP Directory".
2. Click on the "Setup" button at the top of the screen. This should bring you to the PSP setup screen.

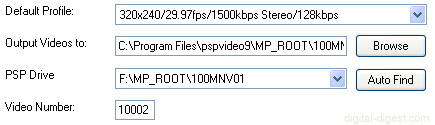
3. The four main settings that we need to be concerned about are "Default Profile", "Output Video to", "PSP Drive" and "Video Numbers".
4. Default Profile: This is possibly the most important option, as this determines the quality and file size of final video. The profiles are listed in the following format:
Video Resolution/Framerate/Video Bitrate {Stereo or Mono}/Audio Bitrate
For the video bitrate, there are two types of profiles - one says somethings like "1500kbps" and another says something like "QB4". The first one uses a constant bitrate (not as good quality, but easier to predict the final file size), and the other uses variable bitrate. With constant bitrates, the higher the value, the better the quality (and larger the file size). With variable bitrate, the lower number indicated, the better the quality (eg. QB4 is better than QB 10).
The following table shows you the output size for some of the selected profiles, for your reference to select the right profile:
| Original Clip Properties: Format: DVD VOB Length: 1 minute 50 seconds Size: 91.2 MB |
Selected Profile: | Output Size: |
| 320x240/15fps/216kbps Mono/48kbps | 4.07 MB | |
| 320x240/29.97fps/QB4 Stereo/96kbps | 6.10 MB | |
| 320x240/29.97fps/1500kbps Stereo/128kbps | 11.6 MB |
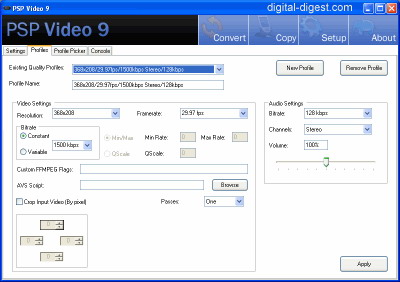
Note that you can create your own profile, and also see the exact properties of any existing profile by going into the "Profiles" section of setup.
5. Output Video to: This is the directory where the output video will be saved to. You can navigate to this directory and copy the movie file manually to your PSP (if you do not use the Copy function in PSP Video 9 to perform the same action).
6. PSP Drive: This is the location if your PSP drive, which is used to store your output video if you use PSP Video 9's copy function.
7. Video Numbers: In order for PSP video files to be playable, they must be named a certain way. The format of the naming is:
MV4*****.mp4
The ***** represents a 5 digit number. PSP Video 9 will automatically increment the number listed in this setup option for you when it creates a new video file. You can manually change it here in case you already have video files using these numbers or if you want to reset the number back to a lower number.
Step 3---Convert Movie
1. Now that the hard work has been done, it's time for PSP Video 9 to do its work and convert the movie to PSP video format. This step will take the longest, but won't require any user interaction.
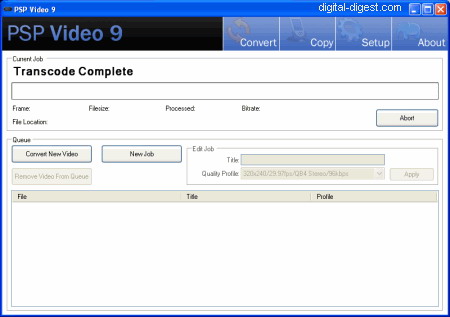
2. Click on the "Convert" button at the top of the screen. This should bring you to the PSP conversion screen.
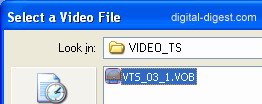
3. Click on the "Convert New Video" button and navigate to the directory that contains your converted DVD files (see Step 1: DVD Ripping, sub-step 8 above), and select the converted VOB file (usually named VTS_0X_1.VOB, where X is a number) and press "Open".
![]()
4. Once you press "Open", the video/audio conversion process will start. All you have to do now is wait for the DVD to be converted.
5. You can also click on the "New Job" to add more videos to convert to the queue.
Step 4---Testing Playback/Copying to PSP
1. The converted video will now be located in the "Output Videos to" directory specified in Step 2: PSP Video 9 Setup above. You can navigate to this directory, and you should see two files created for each video (a .MP4 and a .THM thumbnail) file. If you have QuickTime installed, you can open the MP4 file and play it back to test its quality.
2. If you are happy with the converted DVD, you can now copy the file to your PSP. There are two ways to do this - one within PSP Video 9, and also manually. With either method, you have to ensure your PSP is connected to your computer using the USB connection.
3. Copy within PSP Video 9: Click on the "Copy" button at the top of the screen. This should bring you to the PSP Video 9 copy section.

Here, you can select a file and click on the "Copy Video to PSP" to copy the video file to your PSP.
4. Mannual Copy: If you don't want to use the copy facility within PSP Video 9, you can copy your video files manually to your PSP. First, navigate to your PSP's storage drive (eg. F). Create a directory called "MP_ROOT" if it does not exist - go into this directory and create a sub-directory called "100MNV01" (that's 3 zeroes) if it does not exist. You should now have a directory structure similar to:
F:MP_ROOT100MNV01
Now copy your MP4/THM files that PSP Video 9 created to the above directory.
Hi, guys.That's it. Nice and simple.

Featured Guides
Guides Categories
Video/Audio Guides
- 4Media Audio Converter Pro Tutorial
- 4Media Movie Editor 6 Tutorial
- Video Converter Ultimate Tutorial
- How to convert DAT to other videos
DVD/CD/Blu-Ray Guides
- 4Media Blu Ray Converter for Mac Tutorial
- How to convert Blu-ray disc to video files
- How to burn AVI, MPEG, VOB, DAT, M2V, MPG to DVD on Mac
- How to burn DivX to DVD on Mac
iPod Guides
- 4Media iPod Max Guide
- How to convert AVI, MPEG to iPod MP4 format
- Guide: 4Media iPod to PC Transfer
- How to convert DVD to iPod on Mac
iPhone Guides
- 4Media iPhone Contacts Transfer for Mac Tutorial
- 4Media iPhone Contacts Transfer Tutorial
- 4Media iPhone Ringtone Maker for Mac Tutorial
- 4Media iPhone Max Guide
iPad Guides
Youtube/Online Video Guides
- 4Media Online Video Converter for Mac Guide
- 4Media Online Video Downloader for Mac Guide
- 4Media Online Video Converter Guide
- 4Media Online Video Downloader Guide
PPT/PDF Guides
Others
Articles
- How to download YouTube videos for free
- How to download/convert YouTube videos to iPod
- How to download and convert YouTube videos
- All features of apple iPhone
- Now you can get more TV offerings from Apple iTunes
- Video Streamer HAVA from Snappy Multimedia
- iPod Growth Driving Demand for Flash Memory
- MediaMan HVX-3500 Review
- Uncertain whether new iPod will be delayed or not because of hurdles
- T3's top five iPod alternatives
- Envivio Exhibits MPEG-4 Solutions from Mobile to HD at CCBN2006